

Valentine’s Day is a holiday that brings on a variety of feelings for everyone.
Those who are single might scoff at every heart decoration they see. Those in relationships might be excited, planning what to gift their significant other and wondering what they will receive in return. No matter your relationship status, giving a homemade gift is a great way to show the people you love in your life just how thoughtful you are, without breaking the bank.
One way to elevate a simple Valentine’s gift is by being creative with packaging and presentation. How about sewing a fun felt envelope, complete with a button enclosure? You can use this to hold candy, gift cards, jewelry and other small gifts. It just takes a few easy steps!
Here’s what you’ll need:
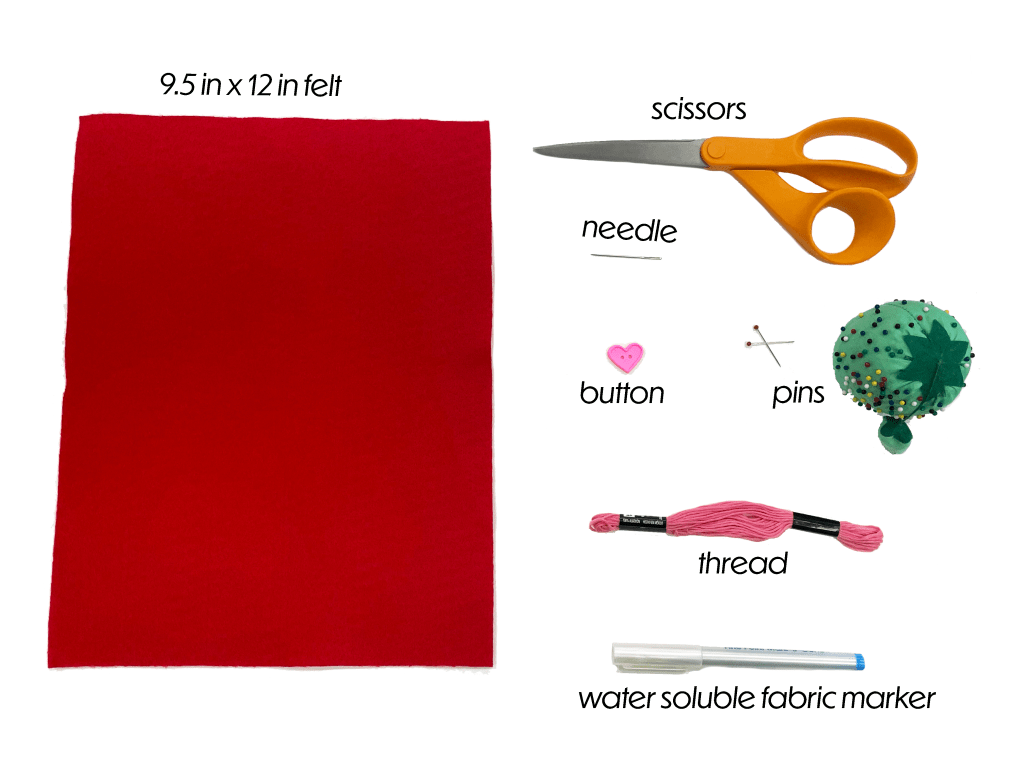
You’ll just need a few simple supplies: felt, a button, a hand sewing needle, pins, scissors, a water soluble fabric marker and thread/embroidery floss. The colors of the felt, thread and button are totally up to you. I used pink and red since they are traditional Valentine’s Day colors.
I used one sheet of 9.5″ by 12″ felt for this project, but depending on the size of your envelope contents, you may want to use a longer sheet.
Here’s how to get started:
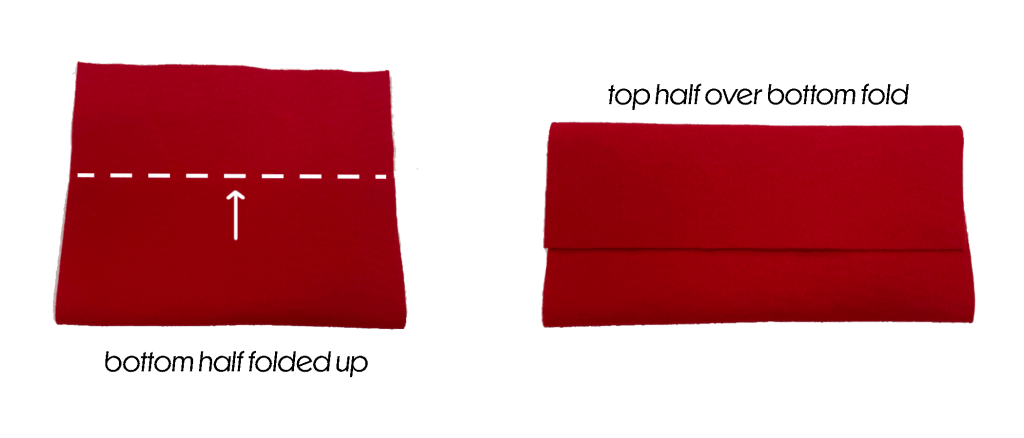
To envision the pocket and top flap, first fold over the bottom of your felt a little higher than the middle of the sheet. Next, fold the top to lay over the bottom fold you just made. This will help you figure out how big you want your pocket to be.
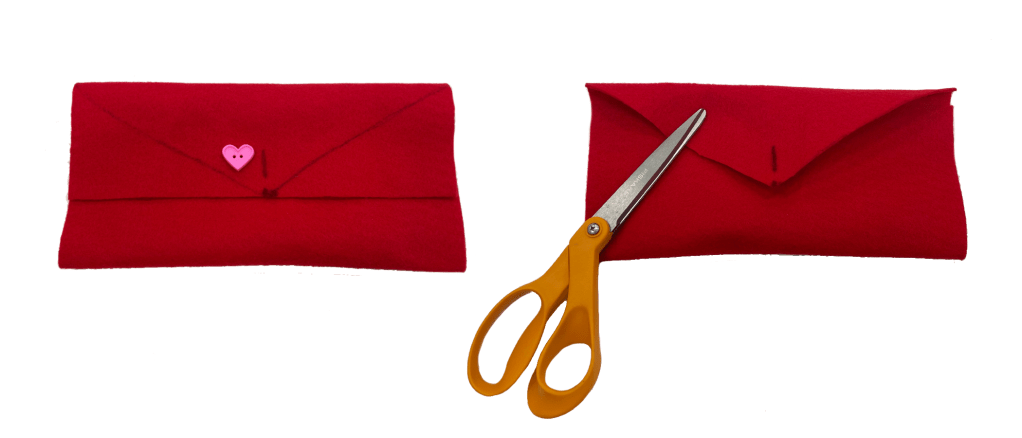
With the top fold, draw a mark in the middle as well as some angles diagonally connecting from the mark to the sides of the felt. Cut on these lines to create a triangular shape. This is going to be the flap of the envelope.
Cut a little slit near the tip of the point, which is for the button later on. Be sure to check if the button will easily fit through the opening.
Sew your button on
To measure where to put the button, check where the top fold and the slit lays on the bottom folded part of the felt. Make a mark directly under where the slit in the top envelope flap sits. This is where you will sew on your button.

Now that you’ve marked where to put the button, you can begin to sew it on!
There are many different types of buttons (four-hole, shank, etc.). I used a two-hole button for mine.
You can thread your needle yourself or use a tool such as a needle threader to make it easier. When the thread is pulled through the needle, make a knot at the end of the two strands of thread.
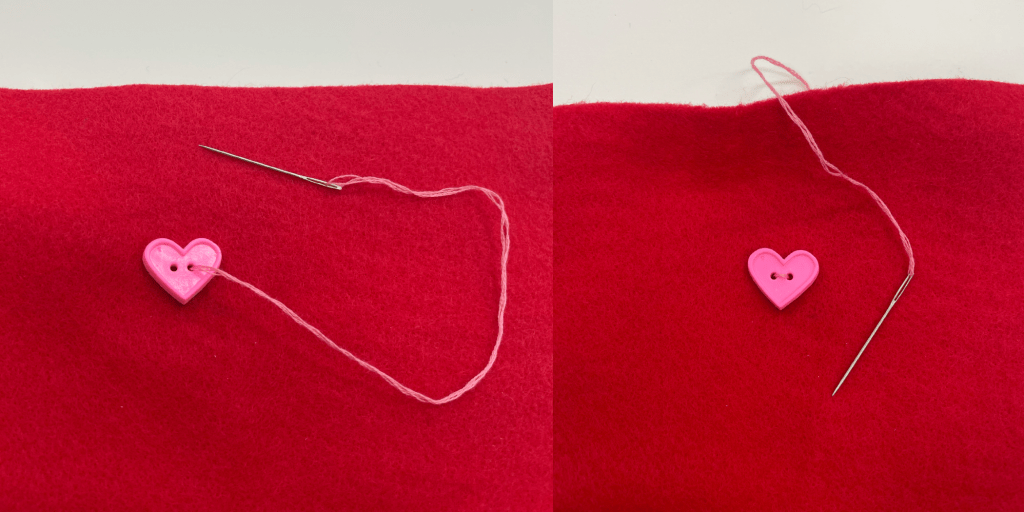
Hold the button down over the marking. Underneath the button, insert the needle into the bottom of the felt, pulling it up through one of the holes. When the knot of the thread hits the back, insert the needle back down through the other button hole. Repeat this process a few more times, going back through the first hole and down the second.

Once it is secure enough, complete your stitch by pushing the needle under the threads in the back, creating a loop. Push the needle through the loop, making a knot. You can also repeat this step a few more times for extra security, and then cut off any excess thread.
You’re ready to sew the envelope!
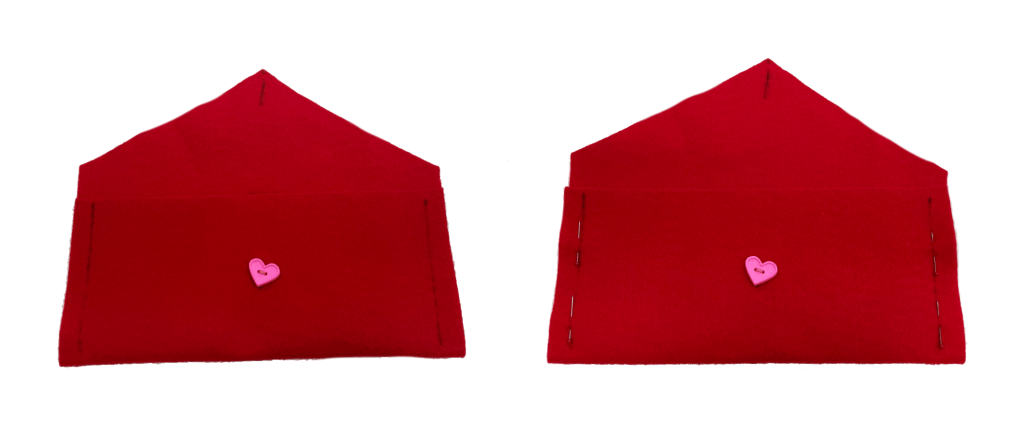
Using pins, temporarily hold the bottom folded fabric in place, making it easier once you begin to sew. With your fabric marker, draw lines where you want your stitches to go.

Making sure that your needle is threaded and the felt is prepped and held in place, insert the needle from the bottom of the felt, and at a half an inch from the edge, pulling it up all the way through. Insert the needle back into the felt from the top, a stitch length forward. Keep these stitches straight with the lines you drew with the fabric marker. Using a basic running stitch, pass the needle in and out of the felt in equal intervals.
When completing your stitch on the first side, you will need to create a knot and secure it. Make sure your needle is coming out of the bottom of the envelope. Next, pull it through the previous stitch, but not completely. Similar to when you finished sewing on the button, there will be a little loop that you can then put the needle through, making a knot. Again, you may want to repeat this a couple more times until you feel it is sturdy enough. Once the knot is secure, you can cut off any excess thread.
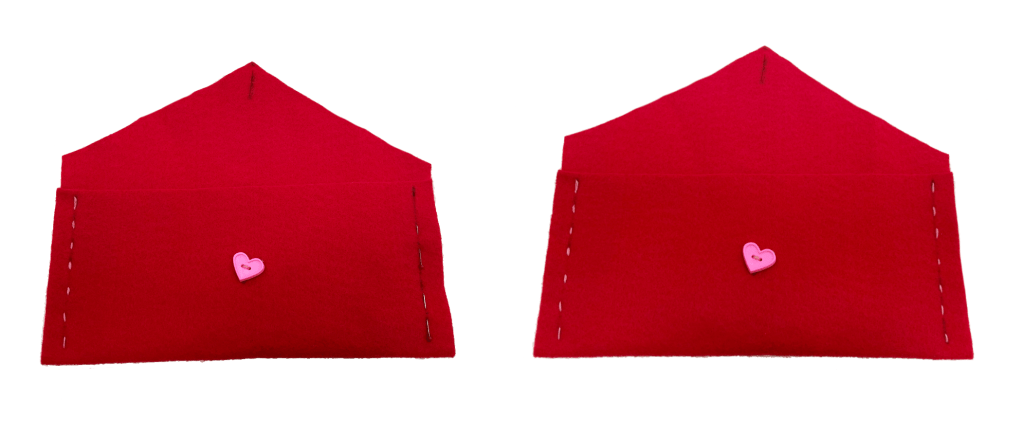
Now that one side is complete, you can now repeat this process and sew the other side of the envelope. Since the fabric marker is water soluble, you can wipe it off using a damp cloth.

Tada! Your lovely little envelope is now complete and ready to be filled with even more thoughtful gifts!


Leave a comment